Sunday, 27 April 2014

Rainbow Scrap Challenge 2014: week 17 and tension issues

April's colour for the RSC 14 is purple
I'm afraid I only have one addition to the purple family this week:

Jacob's Ladder in purple


I've been concentrating this week on getting the quilting done on my quilt for the Triangle Quilt Along at the Sassy Quilter. (Sorry, far to many "quilts" in one sentence!)

Last weekend I posted a quilting question and got so many helpful answers. On whether or not stitching in the ditch is necessary when doing an all over pattern the consensus is: NO! Thank you all who replied. I'm gradually working through writing replies individually. I'm sorry it's taking me so long.

Yesterday, however, I had a setback:
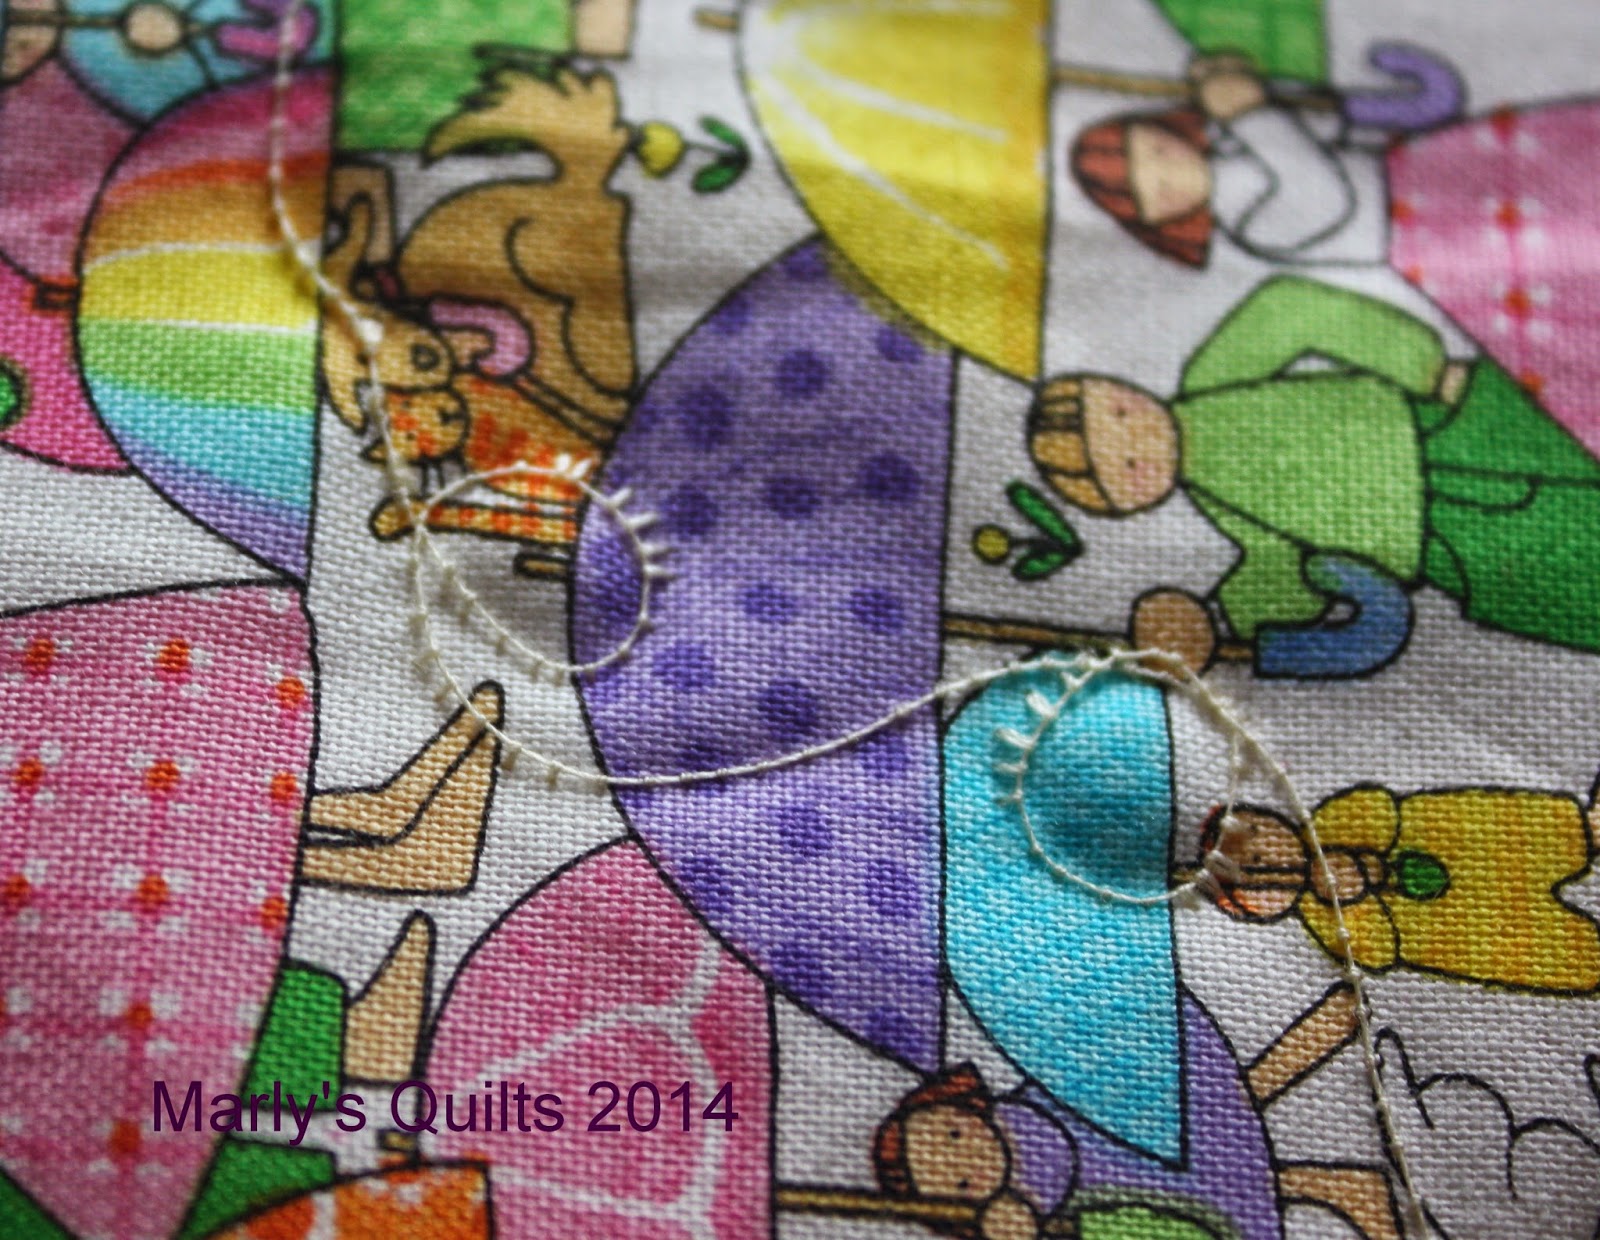
Tension issues
I had done about 2/3 of the quilting when I saw that there were problems with the tension. I had to unpick the quilting on a section about 3'x1'. The photo shows the situation about 6" from the end, but it had been a fairly gradual transition to this from looped top stitches only in bends. They all had to come out. Actually the bottom thread was easy to rip lying on the surface like this, but it was really a chore!


Do you know what causes this?

  • I couldn't see any problems with the thread either on top of the machine or on the bobbin.
  • It seems to have started about 2' from putting in the third bobbin, which I did after parking on the edge of the quilt and removing everything, including fluff, but not oiling (I oiled and fitted a new needle before I started yesterday) 
  • When I stopped to unpick the faulty threads there was an exceptional build-up of fluff round the bobbin.
  • After cleaning and reassembling (about 4 hours later) everything functioned normally on my practice scrap. I still have to try on the quilt.
I blame the fluff, but what caused so much more fluff than otherwise? The needle maybe, but there were no stitching problems later on the practice scrap. Only time will tell.
So I'm now going to continue, but now stop after an hour to check the stitching, the bobbin and the fluff.

I would really appreciate your thoughts on this.

I'm linking up to Scraphappy for the RSC 14 and to
Stitch by Stitch for Anything Goes Mondays


Wednesday, 23 April 2014

Preparing to quilt

At the moment I'm trying arrangements to make cushion covers from the triangles left from the triangle quilt. I don't really need cushions, and I'd rather make another quilt, a wall hanging this time, with big hexagons on a pale blue/grey background. 


But I do need to practise FMQ on the fabric used in this quilt. It's my version for the triangle quilt along at the Sassy Quilter.


May I pick your brains? If I do an allover pattern, swirls or ripples, do I need to stitch in the ditch first to stabilize? The quilt is 1.80 x 2.20m (approx 6 x 7') and I'll be quilting on my Bernina 440 QE, so there's an awful lot of quilt to fit in to the right of the needle. I shall be pinning the quilt sandwich together with safety pins.

I welcome your ideas on this.


I'm linking up to:
Freshly Pieced for WIP Wednesdays and 
Sew Fresh Quilts for Let's Bee Social

Happy sewing

Marly.

Sunday, 20 April 2014

No-waste Flying Geese

I have made flying geese units by flip and sew, and by Marti Michell's method using her templates and both require sewing along a bias edge, and cutting off triangles (wasting fabric). Then I found this in a McCall's tutorial


The no-waste Flying Geese

1


Step 1

You need one large square and four small squares in a contrasting colour.


Sorry, here comes the Maths ...


Calculate the sizes of the squares according to this formula:

large square (geese): length of finished unit + 1 1/4"
small squares (sky) : width of finished unit + 7/8"

Example: to make 4 identical flying geese with these measurements:
Length of finished unit: 3"
Width of finished unit: 1 1/2"  
you will need:
1 Large square (geese)  3 + 1 1/4" = 4 1/4"
4 Small squares (sky)  1 1/2 + 7/8"= 2 1/4"


**  If you'd prefer metric, click here for Vireya's metric maths.  **

2


Step 2

Draw a diagonal on the back of all the small squares
3

Step 3

Pin 2 of the small squares, right sides together, onto the large square, as show in the photo. Make sure that the two diagonal lines form a continuous line and that the corners of the squares are aligned precisely


4a
4b

Step 4

Sew 1/4 " on each side of the line.


5


Step 5 

Cut along the drawn line.


6

Step 6

Fold the small triangles back and press.


7


Step 7

Pin the remaining small squares to each of the units, as shown in the photo.


8

Step 8

Sew each side of the drawn line, as at step 4. The two units can be chained pieced.
Cut along the drawn lines, as at step 5


Step 9

Fold back the small triangles, press and cut off the dog ears.

9


Voilà. Four flying geese units

and a tiny pile of dog ears.


Linking up to Sew Many Ways: Sew Darn Crafty Linky Party.


Happy Sewing

Marly.


Saturday, 19 April 2014

Rainbow scrap challenge 2014: week 16

I am participating in the Rainbow Scrap Challenge where we make blocks on a specified colour each week. This month's colour is purple.

Production increased by 100% this week over last week!


Snowball and Dutchman's Puzzle
I was able to use the four flying geese units that I made the wrong way round a couple of weeks ago (see this post) in the Dutchman's puzzle block.
If you're interested in how I made the flying geese units  I'm putting a tutorial under the tutorials tab at the top of my blog, when I've worked out how.


I'm linking up to Soscrappy 
so hop over there to see what others have made for the challenge this week


Happy sewing,

Marly.

Thursday, 17 April 2014

Triangle quilt along: top finished.


 This week has been a race against the clock. Finally I can report the piecing is finished. 


I positioned the triangles randomly. I did however make piles of one of each fabric and first place them on the design wall and swap them around a bit until I was satisfied. I was terrified of getting to the last row with a handful of identical triangles. So i guess that's controlled random!


rows pinned together:
not through the join, but close either side.
I have learnt a lot this week, but there is just one thing I'd like to share: 

  • When joining the rows I put a pin through the points, as  Paula at the Sassy Quilter suggested. 
  • Then I put a pin about 1/2" each side where there are fewer layers of fabric, and removed the first pin. 
I'd never pinned this way before, but found when I started joining the rows that the fabric was bunching up on the pin and distorting. This way the join stayed flat and was easier to lead under the foot.

This was a tip I saw last year in a McCall's video in the Sand and Surf project; sorry I don't remember which lesson! I had forgotten all about it, but it came in handy this afternoon.


I'm linking up to Paula at the Sassy Quilter for 

Happy sewing

Marly.


Monday, 14 April 2014

On my design wall 14 April

I'm linking up on Wednesday 


This is on my design wall at the moment.  


rows 7 to 10 of the triangle quilt on Monday afternoon.

These are rows of my Triangle Quilt, for the Triangle Quilt Along at The Sassy Quilter. In the photo above the top two rows are completed and stitched together, the third row is almost completely pieced and the fourth partly. My design wall isn't wide enough for this single-bed size quilt, the patches at the ends keep falling off!


Detail of third and fourth row.

The first six rows are completed and have moved to the living room floor:


Another three rows will probably be enough, and then I'll be moving on to the borders.

I'm linking up with Patchwork Times for Design Wall Monday and 
with Stitch by Stitch for Anything Goes Mondays.

Saturday, 12 April 2014

Finish along Q2

In an effort to prioritise my projects I'm participating in the finish along hosted by Katy at The Littlest Thistle.

I think finishing the following 5 projects should be feasible

1. Triangle quilt:


I'm participating in the quilt along hosted by the Sassy Quilter, but making a single-bed sized quilt. I have just under 500 triangles cut. I was late starting sewing because I wasn't able to buy more fabric until Saturday but I'm hoping to catch up this week and, if I keep on schedule, should be finished by the end of April .


2. Jigsaw quilt: 

Jigsaw quilt pattern by Pam & Nicky Lintott
from Two From One Jelly Roll Quilts
in Mmeropolitan Fair by Barbara Beckman for Moda
The top is finished, I have the wadding, but I still need to get backing fabric. I forgot to buy some when I was at the quilt show last weekend. This should be finished in May.


3. Celtic Solstice (Bonnie Hunter Mystery December 2013): 


The top is in four pieces (hence the labels), joined in rows, and has been since the second week in January! To make it ready for quilt-as-you go I just have to join the rows (at present they're webbed). I have both wadding and backing fabric. The problem is I now wonder if I could maybe quilt the whole single bed sized quilt in one go on my Bernina 440QE. Quilting the entire quilt in one go would enable me to try some more interesting quilting, maybe emphasizing the circles. This has to be decided and done, I hope before the end of June.

4. Cardigan


Back and both fronts and hopefully enough wool for both sleeves.
otherwise they'll have to be 3/4 sleeves.


which I started a couple of years ago, before Carpal Tunnel Syndrome forced me to stop knitting. When you can't knit one needle in one go, you know it's time to stop. After operations on both wrists last year I'm going to pick it up again. Now, where was I ...?


5. Toadstool House mini quilt:


I started this in a workshop on using the Apliquick: it was the piece for the workshop, but to be honest, it's not my thing. This is the first time I've started something and really lost interest very quickly. It's such a small thing, and most of it is cut and ready to appliqué, but until a few moments ago I was seriously considering scrapping it al together. But I don't like giving up, so here it is. This is going to be a real challenge to finish. Meanwhile I can be thinking what I'm going to do with it. Any ideas?

Happy sewing and fortuitous finishes

Marly.