Saturday 28 February 2015

RSC 15: week 9: the last of the pinks


Each month, Angela, at Soscrappy, chooses a colour, and a lot of people make blocks in that colour. She also gives directions for sampler blocks, and in February there were two:
Lady of the Lake in Sawtooth Star

Marley in Sawtooth Star
After making those I cut some small pink pieces into 1½" squares and and added to the left over sashing strips from my RSC 14 and Little Letter quilts to make 9-patches:


From the pieces that were too small, or not straight enough, I "made" fabric. Not much yet, but I just found another bag of off-cuts.


I have no idea what I'm going to make these into, but I think they'll come in useful some day. I plan to do this each month in the colour of the month.

I am at a screen printing workshop today, so shall be linking up later than usual with

RSC 15

Hop over there, and look at all the pink delights made this month.

Happy sewing

Marly.

Sunday 22 February 2015

Camera Challenge 1

Katy at the Littlest Thistle is running a camera challenge, to help those of us who are photographically challenged to enhance our skills.

This month's challenge is to compare using automatic settings and using the pre-sets.

My camera is a Canon EOS 450 D, digital reflex, which I have had for about five years. All these photos were taken using the 18-55 lens.

Portrait

pre-set - portrait
auto 


The pre-set used the flash, even though this was outside on a sunny morning. The extra light minimised the shadow, especially noticeable in his beard. This would probably make a portrait more flattering by equalising skin tone and minimising wrinkles (I tried a self portrait, but flash and mirror don't mix!). I am surprised that the bush in the background is not more clearly defined in the automatic setting.

Landscape


auto

pre-set - landscape
The only difference I can see here is pre-set is lighter. I don't think this is the most inspiring landscape but the pre-set shows more contrast. 

Close up


auto

pre-set - close-up
Both photos were taken with the automatic flash which makes the background dark. Neither give the true colour. In the pre-set photo another orchid stem to the left of the subject is less defined than in the automatic, but that may be because I moved closer to the subject.

Action


auto

pre-set sports

I don't see much difference here either. However the automatic is lighter even though there were only a few seconds between the two shots. In both the drops are visible, which I hadn't expected from the automatic. I got a surprise, however, when using the sports setting because it's in continuous shooting mode. That's not necessary for a fountain, but I do use the manual setting "continuous shooting" when photographing my grandson's football matches; really useful for getting ball-on-foot shots.
Looking again at the original photos at 100% size, and not these .jpg versions, the drops are much clearer in the sports than in the automatic, where they are all elongated.

Well Katy has certainly set me LOOKING at my photos and also comparing the data. I hope that as this challenge progresses I'll know what I'm doing well enough to be less of a hit and miss camera junkie.

I'm linking now to

The Littlest Thistle

Click on the logo to see what fabulous photos other challenged photographers have made.


Happy snapping everyone

Marly.

PS

While I was crawling around photographing the orchid I couldn't resist taking a shot with a manual setting (Av 5.6) focussing on the very centre of the flower. No flash; the background is a net curtain and there's brilliant sunlight on the other side. The colour isn't right here either, but it's more realistic than in the two above.


Tuesday 17 February 2015

Little Letters finished


2015 FAL at On the Windy Side


My Little Letters quilt, is finished. This was a QAL on the blog of  the Temecula Quilt Company last autumn, and while the letters were finished in December (see here) I have now got it finally quilted and bound.


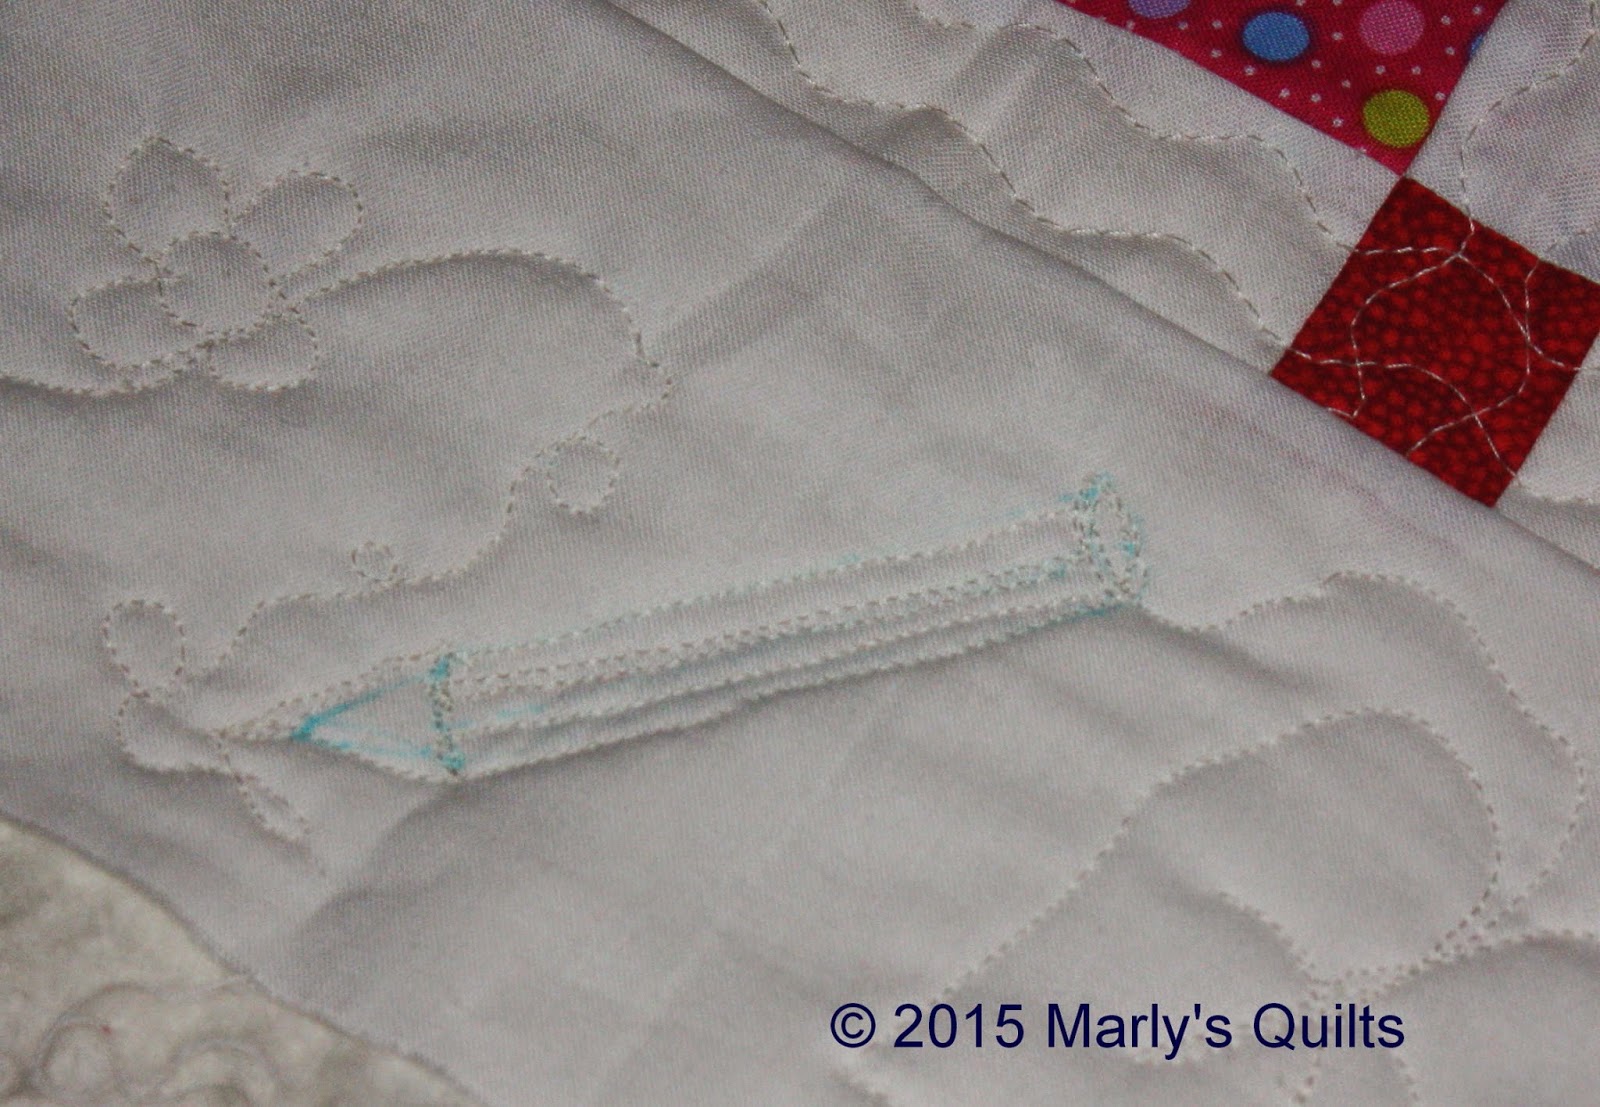
I quilted the border with a mixture of flowers and leaves, without a real plan, but making sure there was  flower in each corner. There is also a Charlie's pencil (see here and here)in the border, next to the U.

Thank you to those of you who gave advice on the binding last week. I chose scrappy! I didn't have enough of any of the fabrics to use just one fabric, except the white background fabric. I generally cut my binding fabric 2" wide which gives a very narrow border to the quilt which doesn't finish as such an important design element.

Scrappy binding: the smallest piece is barely 3" long, the rest between 10" and 16".


I left the letters unquilted, only quilting in the white space between them. There wasn't a quilting plan as such, I just went with the space available, and really enjoyed the letters, like D, O and U with a single large piece of white.


        I really do have to practise STRAIGHT FMQ more!


and now it's been washed; I love the crinkles! 


Quilt statistics

Pattern:
Little Letters by Temecula Quilt Company
Size:
34½” x 39½”
Fabric:
letters: scraps; background: Bella solid; backing: "Simple Pleasures" by Fresh Designs for Henry Glass & Co.

Wadding:
Cotton from LQS.
I'm linking up this week to:

   Freemotion by the River    Sew Fresh Quilts Needle and Thread Thursday   tgiffriday


and at the beginning of April to:
2015 FAL at On the Windy Side

For my list of would-be first quarter finishes click here.

So go and see what else is doing in the Quilting Community. And now I'm going to do some more sewing towards a finish.

Happy sewing

Marly.

Saturday 14 February 2015

RSC 15 week 7: Pink points


Each month Angela at So Scrappy gives a different colour, and this month's colour is pink. She is also giving some sampler star blocks this year, and I'm making the sampler blocks, with midnight blue as my background colour. When Angela posted this block she didn't know its name; I don't either, but it's reminiscent of the block in my jig-saw quilt.

Jig-saw block (?) in Sawtooth Star
First I made the star points of the bright pink fabric of the large square, but when I laid it out it looked frightful, so I made new stars of a lighter, and more importantly, low volume print. Now I have a set of blue geese on a very bright background to incorporate into the back!

January's colour was medium blue, which meant medium blue centre block and star points in the Sawtooth Star. As there wasn't enough contrast with my background colour, I reversed the scheme: neutral blocks and star points. finally I've managed to finish the Sawtooth Star surround of the Card Trick block

Card Trick in Sawtooth Star

I like this colour scheme, and bought another 3 metres of the blue fabric this week. Not exactly scrappy!

I'm linking up to SoScrappy for

RSC 15

So hop over there to see more starry pink points.


Happy sewing

Marly.

Sunday 8 February 2015

Little Letters Quilted

Last Wednesday I reported that I'd started quilting my Little letters quilt, a quilt along from The Temecula Quilt Company. I finished quilting this afternoon.


I used a double row of serpentine stitches in the sashing, and FMQ on the white space inside the 4" blocks. I intended doing a different design in each block, but ran out of ideas, so several of them have the same quilting pattern. Not exactly the same, obviously, because the white space around each letter is a different shape.


The photos were taken this evening using flash, which tends to equalise the result by removing shadows, so rendering the quilting almost invisible. I counteracted this somewhat by crouching low and using maximum zoom. Perhaps there's now too much shadow!

Charlie's pencil
The border is of leaves and flowers and one pencil (read more about the pencil here and here). For the pencil I tried to get the lines straight by drawing it in first - the only pencilled motif in the whole quilt - but I couldn't keep on the lines. I hope when the blue ink is washed out it still looks like a pencil. If not I'll have to add some hand stitching.


Now I have a question: what would you bind this with? I have two options:
  • off white - the same as the background for the blocks, the sashings and the borders, or
  • scrappy coloured - using some of the fabrics I used for the letters
I'm linking up to Pink Doxies for Pet project show.
And with Cynthia at Quilting is more Fun than Housework (here, here!) for Oh Scrap!

Happy sewing

Marly.

Saturday 7 February 2015

RSC 15: week 6 In the pink ... and blue!

Each month Angela at So Scrappy gives a different colour, and this month's colour is pink. She is also giving some sampler star blocks this year, and I'm making the sampler blocks, with midnight blue as my background colour.

I only made one block this week:


Click on the button below to hop over to So Scrappy to see what other rainbowly challenged patchworkers have been making this week.

RSC 15


Happy sewing

Marly.

Wednesday 4 February 2015

Work in Progress: Little Letters


I started quilting my Little Letters quilt (for more information see here) this morning. I love this quilt, it's so sweet, and small! I started with a double row of Serpentine stitch along the sashings, and then quilted the white space in the blocks, leaving the letters free of quilting. 


I tried to do FMQ in straight lines, but I'm really terrible at that, squiggles and circles go much better.
This week Amy  at Amy's Free Motion Quilting posted about a foot that fits a Bernina and is suitable for use with a ruler so I shall be keeping an eye on developments there. I guess I'd get better straight lines with a ruler!

"O"


I'm hoping to finish this soon, as I've got two more tops waiting to be quilted on the machine, and a mini to do by hand.

I'm linking to
Wednesday link up Sew Fresh Quilts Needle and Thread Thursday blogbutton photo peacockfmq025_zpse5bceb10.jpg

so go and visit over there and see what else is being produced in the quilting world this week, while I go and put some stitches in my mini quilt.

Happy sewing

Marly.