Tuesday 22 March 2022

Kawandi Finish


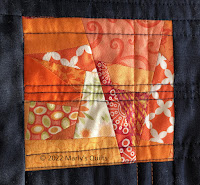
 My goal for this month was to finish the Kawandi quilt I started at the end of February. And I did! Here it is: 


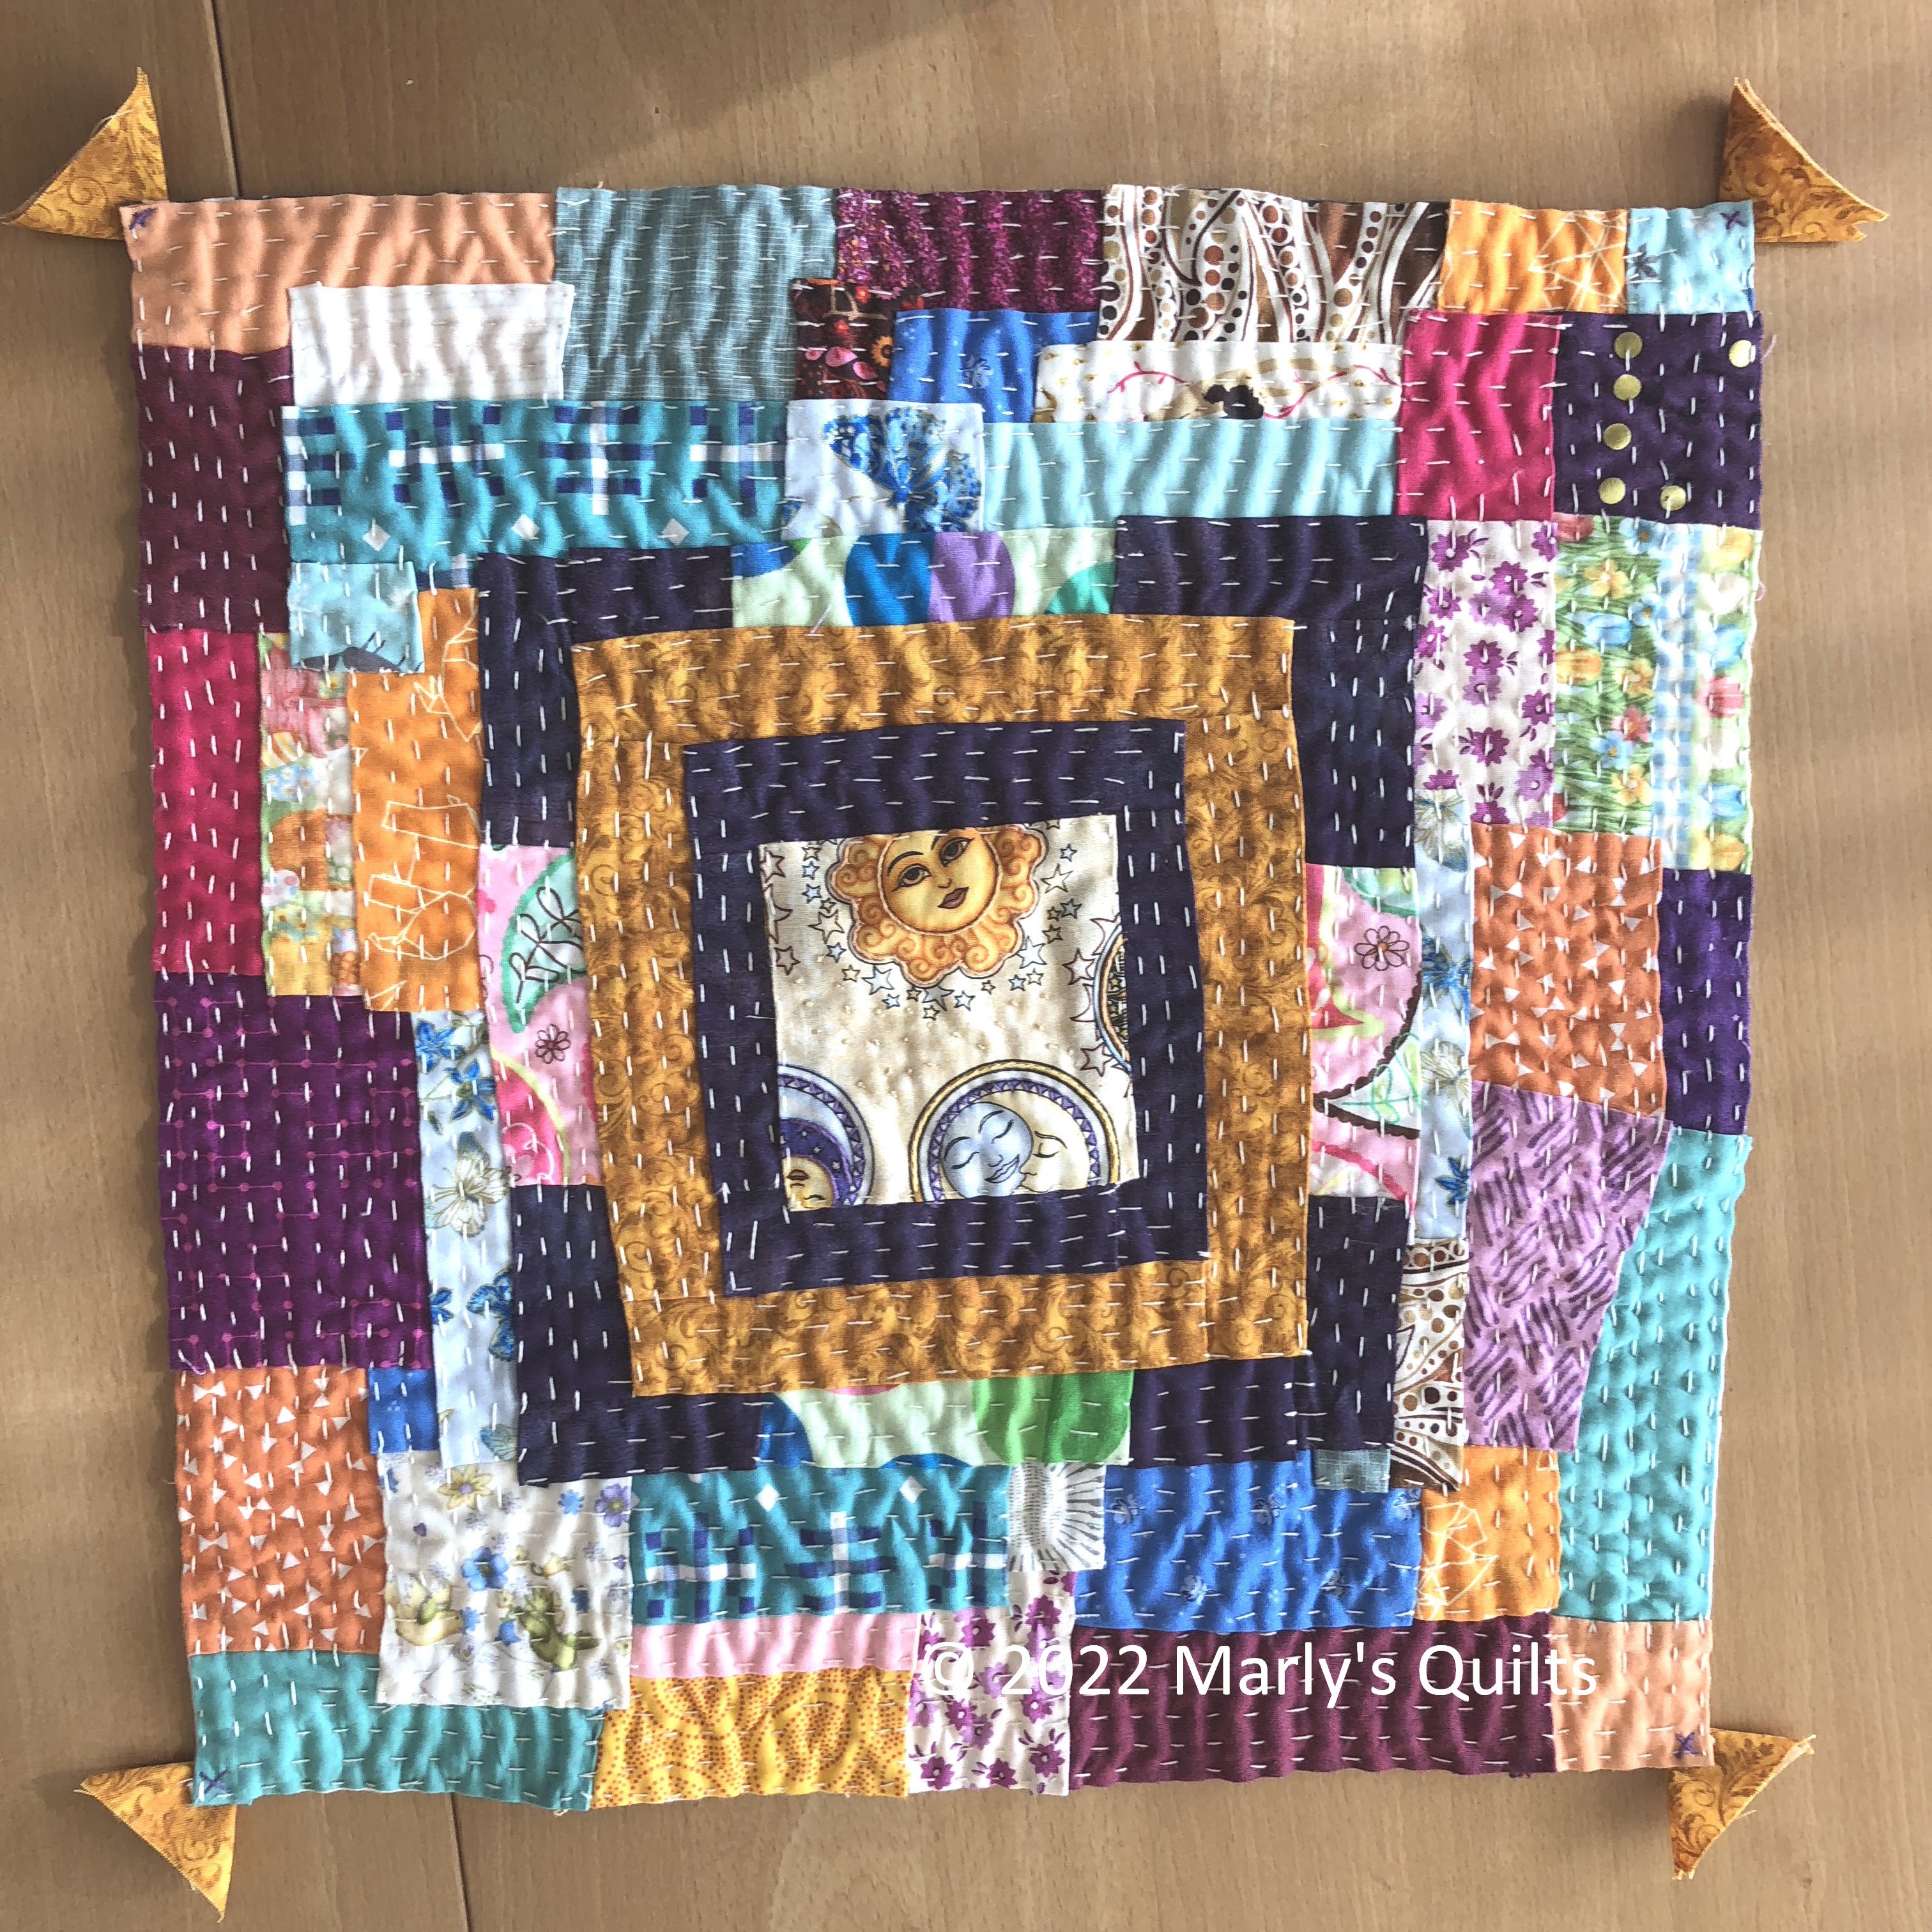
It is just 38 x 38 cm, and made from a bag of scraps from other members of the Dutch Modern Quilt Guild. The rules of the challenge were to use scraps from the bag to make something and to only use two fabrics from your own stash. Apart from the backing and wadding I only used one fabric - the purple frame and the corners to the centrepiece; all the rest was from the bag.

I used Aurifil no. 12 cotton throughout, except for the French knots in the centrepiece which are two strands of DMC stranded cotton. 

Centrepiece quilted with embroidery: stem stitch, running stitch and French knots.

I posted earlier about this project: here and here . In the second of these posts I described the process. 

Although the process is not difficult I found this slow going at the beginning. Not surprising as I had to find a way to anchor the side edges of the pieces as I added them, and the lines of stitching are obviously longer on the outside of the piece. This was intended as a sampler, a practice piece; I knew it wouldn't be perfect and yet I'm satisfied with the result. I learnt a lot in the making!

I am linking up to: 

 Click on the link to see what others have been up to.

Happy sewing

Marly.

Monday 14 March 2022

Kawandi update.

 Two weeks ago I posted this photo of my mini Kawandi project:

Kawandi is the name for quilt in the dialect of the Siddi people in India. I've never been to India, but saw a few videos about these quilts while wandering around YouTube. As I'd never made a quilt using this technique I thought the Dutch MQG challenge to make something from other members' scraps would be the perfect opportunity to start.

Now it looks like this. The sewing together is finished. It measures 29 cm square and I just have to decorate the centre and make the "tassels" on the corners. Finishing this is my one monthly goal.


Characteristic of kawandi is the construction from the outside inwards using only two tools: a pair of scissors and a needle.

  • Starting with a foundation (I used a layer of backing and of wadding) the quilter folds the edges of the foundation in by about a quarter of an inch. 
  • The bottom of each piece to be added is first folded under, along with one of the ends - I'm right-handed, sew from right to left so I folded the right hand edge under. 
  • The piece is joined to the foundation by a line of running stitches close to the edge, enclosing the raw edges. 
  • Pieces are added, overlapping the previous one, until the edge of the foundation is completely covered. 
  • More rows are added in the same way until the whole foundation is completely covered.

Not using an iron or a rotary cutter gives a wonky effect. I think the puckering has come from hand sewing through three layers, compressing the wadding in the process. While I moved on to the next few stitches the wadding sprung back into place. But this is just my idea, if anyone has another explanation, other than that I'm rubbish at hand quilting, please let me know. 

The women in India who use this technique simply sew the pieces to a single foundation layer. When they have finished they add the backing, leaving a small opening on the fourth side through which they fill the kawandi with cotton waste. I'll try something like that next time (!) but substitute wadding for the cotton waste, and sew it onto the top together with the backing. Unfortunately that will also require quilting, and to be honest I've done enough hand quilting over the last three weeks to last me for the rest of the year!

Happy sewing

Marly.

Tuesday 1 March 2022

Kawandi mini project


The Dutch Modern Quilt Guild issued a challenge for last year to make something from a collection of scraps. Not any old scraps, but a bag that would be coming in the post. There was just one bag that circulated each month and the idea was that everyone would take what she needed during a month, make something, and send the bag on to the next on the list after making up the weight from her own scraps. Mine was due in December but arrived some two months late.

I had just been watching some interviews with Margaret Fabrizio on YouTube, talking about kawandi (an Indian word for "quilt") so the scraps came at just the right moment. My project became "making a kawandi sampler".

This was my progress at the beginning of February but I've done very little since so I have to get a move on! I don't know how I could have avoided the wadding puckering, short of gluing it down; something I dislike doing indoors and the weather over the last two months has been very gloomy and windy. It wasn't gluing weather at all. That wadding will need to be trimmed, but I'm leaving trimming until it's impossible to go further. 

It's an interesting technique, starting on the outside and working inwards. The Indian Sidi women usually start with a border strip going right around the edge, but my scrap bag from the guild didn't include such long pieces. This has been improvisation from the word go.

My one monthly goal for this month is to finish making this little quilt. At least, with this technique, finished is well and truly finished!

I'm linking with

Click on the button to see what other contributors are planning to do this month.

Happy sewing

Marly.

Crumby Squares Tutorial


This month it's my turn as Queen Bee in the Do Good Stitches Comfort Circle.

Good morning friends. This month you have the chance to use up some of your small scraps in making four squares which will finish at 7" in the quilt. 

I’d like you to use your scraps to make a 5.5” crumb square in one colour and then surround the square with a 1.5” border of one fabric in the complementary colour. You can choose to make all four squares in the same colour, or make one each of four different colours; it's up to you.


 Preparation


  • So pull scraps of the same colour – different fabrics, different shades, all shapes

  • Make sure you have a 1.5” strip at least 27" long (see below) of the complementary colour (the one directly opposite your first colour on the colour wheel) for the border. I prefer to use a solid or near solid for the border, giving good contrast in tone without competing with the crumb square. (For reference I've added photos of the colour wheel and how to find the complementary colour):

    photos: © Joan Wolfrom "3 in 1 color tool
    "
        

  • No black or white and also no navy blue for the border please.

various fabrics but all orange

Join two pieces


Method

  • Use a 0.25" seam throughout.

  • Sew the scraps together (starting with an irregularly shaped piece), pressing the seams open.  
  • Don’t just use strips; we don’t want a rail fence block.
  • If it’s starting to look like a rail fence, then cut across it at an angle and turn one of the pieces round or keep it apart and use it in another block.

    and trim

  • Keep adding and trimming until your piece is larger than 5.5" square.
  • Select your final square, check, and CUT!

  • Attach the border: 2 strips 1.5" x 5.5" and 2 strips 1.5 x 7.5


Finally trim your block to 7.5" square (5" crumb square plus a 1.25" border on each side) which will be 7" square in the finished block.
 

Good luck

Happy sewing
 
Marly.